Google Tag Manager Setup Guide for UK Teams
Complete google tag manager setup guide for UK teams. Learn to install GTM, configure tags, dataLayer events, consent mode, and QA before publishing.
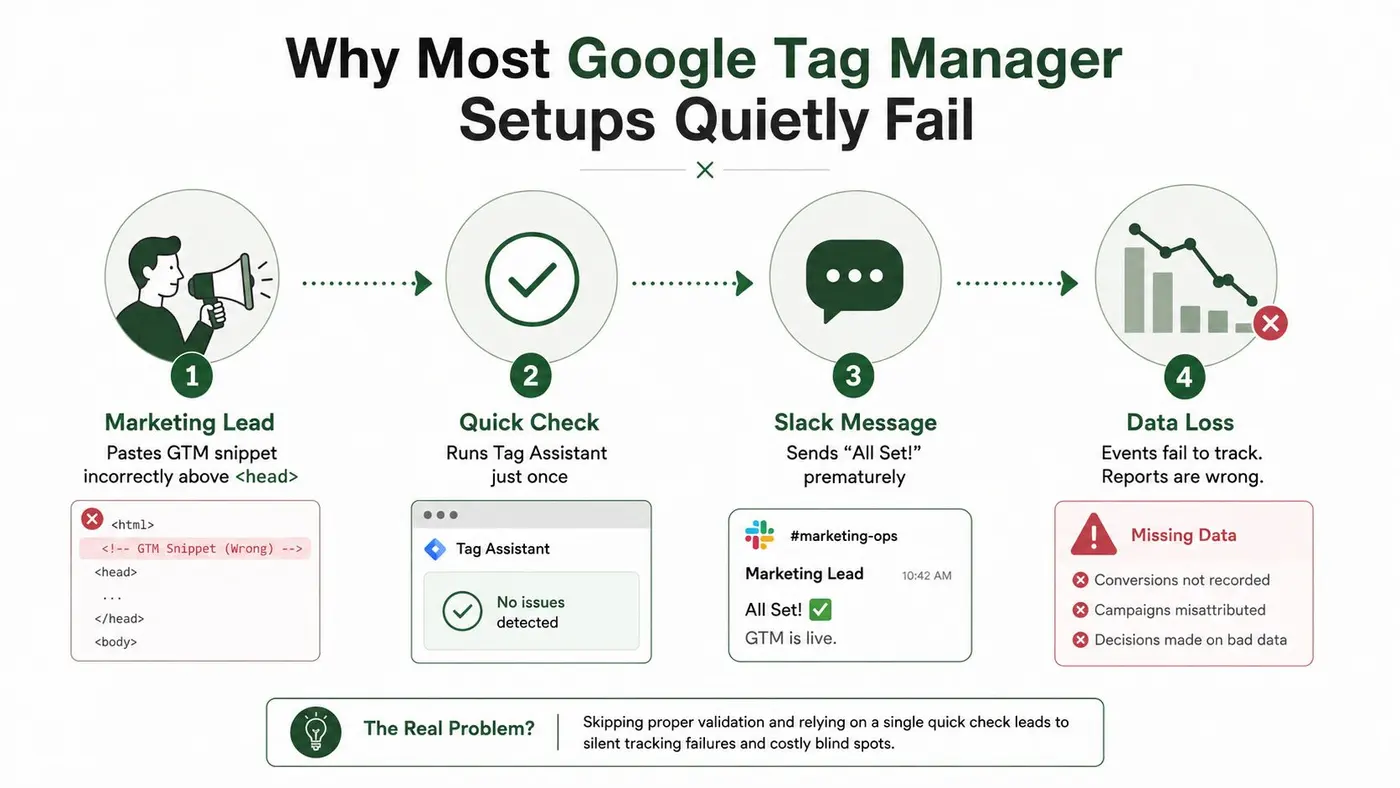
A marketing lead pastes the Google Tag Manager snippet into the site template, opens Tag Assistant, sees a green tick and posts “tracking is live” in Slack. A few weeks later, the analytics team finds missing purchases, duplicated page views and a single-page application that never records navigation correctly. The container exists, but the measurement system doesn't.
That's the reality of a modern Google Tag Manager setup for UK teams. Installing the snippet is the easy part. The difficult work is deciding what must happen before tags load, how consent states reach Google, how developers structure the data layer, how SPA routes generate virtual page views and how a shared container stays understandable after several people change it. GOV.UK guidance confirms that GTM can send data to Google Analytics 4, but it also requires a cookie consent banner and a mechanism for users to update their choices when analytics or marketing tracking is used through Tag Manager. (UK government Campaign Platform analytics guidance)
Why Most Google Tag Manager Setups Quietly Fail
Most failures start with a reasonable shortcut. Someone installs the container, adds a GA4 tag, tests the home page and assumes the implementation is complete. That check proves only that a browser can load GTM. It doesn't prove that the right consent state existed before the tag, that events contain usable business data or that the setup works after a route change.
UK teams also have to treat tracking as a privacy decision, not just a technical one. The Information Commissioner's Office describes cookies as small files of letters and numbers downloaded when someone visits a website, while its broader storage and access guidance covers tracking technologies beyond cookies. The guidance was refreshed in June 2025 and notes a further review following the Data (Use and Access) Act coming into law on 19 June 2025. (ICO guidance on storage and access technologies)
The real failure points
A container can appear healthy while the implementation is materially wrong:
- Consent ordering: A Google tag loads before the default consent state is set, so the team can't demonstrate that tracking began in the intended state.
-
Duplicate collection: A legacy
gtag.js, hardcoded GA4 tag or second container remains in the template and sends the same interaction more than once. - Unstructured events: Developers push inconsistent names and parameter shapes, leaving analysts to reconstruct purchases and sign-ups from unreliable browser interactions.
- SPA navigation: The browser changes views without reloading the document, so the initial page view is the only page view recorded.
- Container drift: Old tags, unclear names and unowned workspaces make it difficult to know what can be safely changed.
Practical rule: Treat GTM as a governed sequence of decisions. The snippet only starts the sequence.
The UK government's published instructions are useful because they connect GTM implementation with consent handling rather than treating analytics installation as a separate task. That mindset matters more than any particular interface setting. A compliant setup must load the container in the correct place, establish consent before measurement tags and give users a meaningful way to change their choices.
Creating Your Account, Container, and Snippet
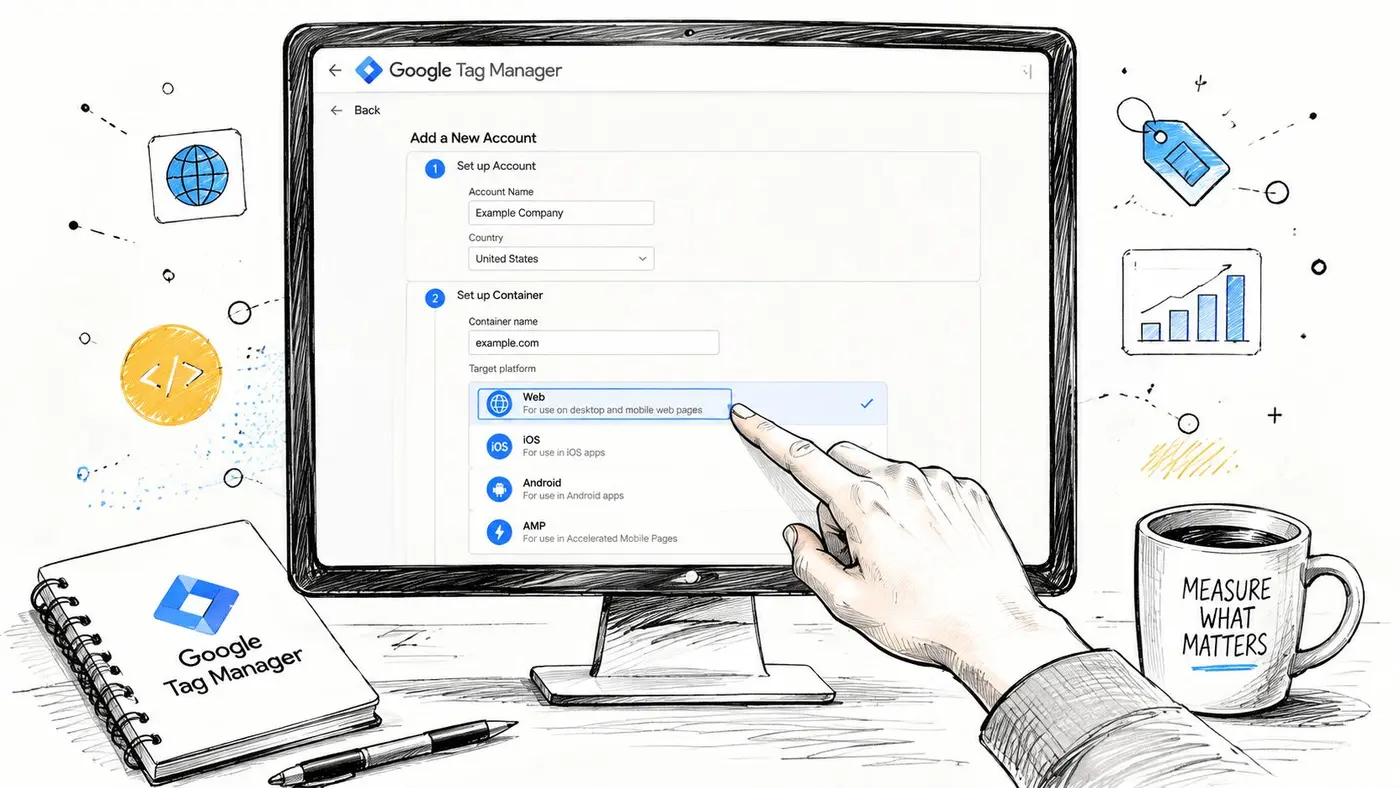
Start at tagmanager.google.com and create an account for the client or business, not for an individual analyst. Use the web platform for a website container, then decide on a naming scheme before anyone creates workspaces. A practical pattern is a brand-level account with containers named for the site and environment, such as production or staging. Keep staging isolated where the site architecture and release process justify it.
The container name is operational information. “Website container” tells the next analyst very little. A name that identifies the brand, property and environment makes access reviews and incident response less painful. Give each analyst a clearly named workspace, and use descriptions when a change affects consent, ecommerce or the data layer.
Google's installation guidance says the Google tag snippet belongs immediately after the opening <head> element and that only one Google tag should be present on each page. (Google's Google tag installation guidance) The companion noscript portion belongs immediately after the opening <body> element. Don't put the body fallback in the head, and don't split the installation between unrelated templates where one page type might miss it.
Search before you install
Before adding anything, search the codebase, CMS integrations and consent platform for:
- Existing GTM containers: Remove duplicate installations rather than layering another snippet over the first.
-
Legacy Google libraries: Look for
gtag.js,analytics.jsand hardcoded GA4 implementations. - Measurement IDs: Check whether the same GA4 property is configured in the site template, a plugin and GTM.
- Platform integrations: Shopify, WordPress and other systems may inject tracking through an app or theme setting.
A duplicate Google tag can produce duplicate page views or overlapping event delivery, and it's often missed because each individual tag appears to work. Use GTM Preview, confirm that the container ID matches the intended property and inspect the fired-tag summary before publishing. No analytics tag should fire accidentally while the consent state is still unresolved.
For a second practical walkthrough of the account and installation process, remarkable data with Tag Manager is useful as a reference for teams documenting their first implementation. The important point remains unchanged: install the container once, place each snippet in its intended location and validate the live page rather than trusting the CMS settings alone.
Configuring Triggers, Variables, and Core Tags
A clean container starts with a small vocabulary. Enable the built-in variables that support page analysis, including Page URL, Page Hostname, Page Path and Referrer. Add click and form variables only where the implementation needs them. Avoid creating a custom variable for every value in the data layer. Ecommerce parameters such as transaction_id, value, currency and items can usually be mapped directly in the relevant tag template.
The baseline tag set should separate configuration from events. A Google tag or GA4 configuration tag establishes the property connection, while GA4 event tags send actions such as purchase, sign-up or basket updates. If SPA history is managed manually, configure the initial page view deliberately so route changes don't create duplicates.
Consent Initialization belongs at the earliest available stage. It establishes default consent settings before ordinary tags evaluate their triggers. A regular All Pages trigger is too late for that job because another tag might already have been evaluated.
Use names that explain the firing rule
Names should reveal the action, destination and trigger without opening the tag. GA4 - Config - All Pages is clearer than GA4 Main. For event tags, use names such as GA4 - Purchase - Custom Event or Ads - Checkout Conversion - Thank You. The exact convention matters less than applying it consistently and recording ownership.
| Tag | Trigger | Fires on | Consent dependency |
|---|---|---|---|
| Consent Initialization | Consent Initialization | Before ordinary container tags evaluate | Sets the default state |
| GA4 configuration | All Pages, or the chosen initial page trigger | The initial document load | Analytics consent must be evaluated |
| GA4 event | Custom Event | A named data layer event | Depends on the destination and consent state |
| Conversion script | Thank-you Page or Window Loaded | A completed conversion view or settled document | Advertising consent may be required |
Custom Event triggers should match the event names your application pushes. A regex covering purchase, signup and add_to_cart can reduce trigger duplication, but only if the event naming contract is stable. A thank-you page trigger suits a simple server-rendered checkout, while a Window Loaded trigger can be appropriate for a conversion script that needs the DOM to settle first.
Configuration choices should serve reporting, not merely reduce the number of tags. For practical ideas on connecting tracking with experimentation and funnel improvements, data-driven conversion rate optimization tips provides useful context. GTM can collect the interaction, but it can't decide whether the page or offer deserves improvement.
Building a Clean DataLayer for Pages and SPAs
The data layer should be an interface between the application and the tracking tools. Developers own the business facts, such as which product was purchased and what the order value is. GTM owns the routing of those facts to approved destinations. When those responsibilities blur, analysts start scraping button text, CSS classes and page markup that developers later change.
Push important events before the container needs them. A typical pattern is:
window.dataLayer = window.dataLayer || [];
window.dataLayer.push({event: 'purchase', ecommerce: {transaction_id: 'ORDER_ID', value: 0, currency: 'GBP', items: []}});
The example shows the structure, not a value to copy into production. Your application should supply the actual order identifier, value and item array. Place page-load data before the GTM snippet when the first container load needs to read it. If the application declares a new array after GTM has initialised, it can wipe the queue and discard events that were already waiting.
Standard events need a contract
Use one event name and one parameter shape for each business action. Don't call the same behaviour basket_add, addBasket and add_to_cart across different templates. GA4 event tags should read the agreed object rather than infer values from the page.
| Event Type | dataLayer Push | GTM Trigger | Watch Out For |
|---|---|---|---|
| Product view |
event: 'view_item' with product details |
Custom Event | Product data must represent the viewed item |
| Basket action |
event: 'add_to_cart' with item details |
Custom Event | Avoid firing from both the button and application callback |
| Purchase |
event: 'purchase' with transaction, value, currency and items |
Custom Event | Prevent repeat pushes after refresh or payment return |
| SPA page view |
event: 'virtual_page_view' with location and referrer |
Custom Event or History Change | Suppress the duplicate initial page view |
Single-page applications need an explicit navigation model. A route change updates the interface without requesting a new document, so the original page-view event doesn't represent later screens. Listen for the site's router event or use a History Change trigger, then push a virtual page-view object containing the new page_location and previous page_referrer.
Set the initial configuration deliberately. If virtual page views are sent by a custom event, disable the automatic initial page view on the configuration tag and send the first view through the same controlled pattern, or keep the initial view and ensure route handling excludes it. Mixing both patterns is how teams create duplicate views.
Shopify teams should also account for the platform's theme, checkout and app boundaries. The practical implementation issues are discussed in Google Tag Manager for Shopify, especially where the data layer needs to remain consistent across storefront interactions and purchase flows.
Consent Mode v2 the Right Way for UK Traffic
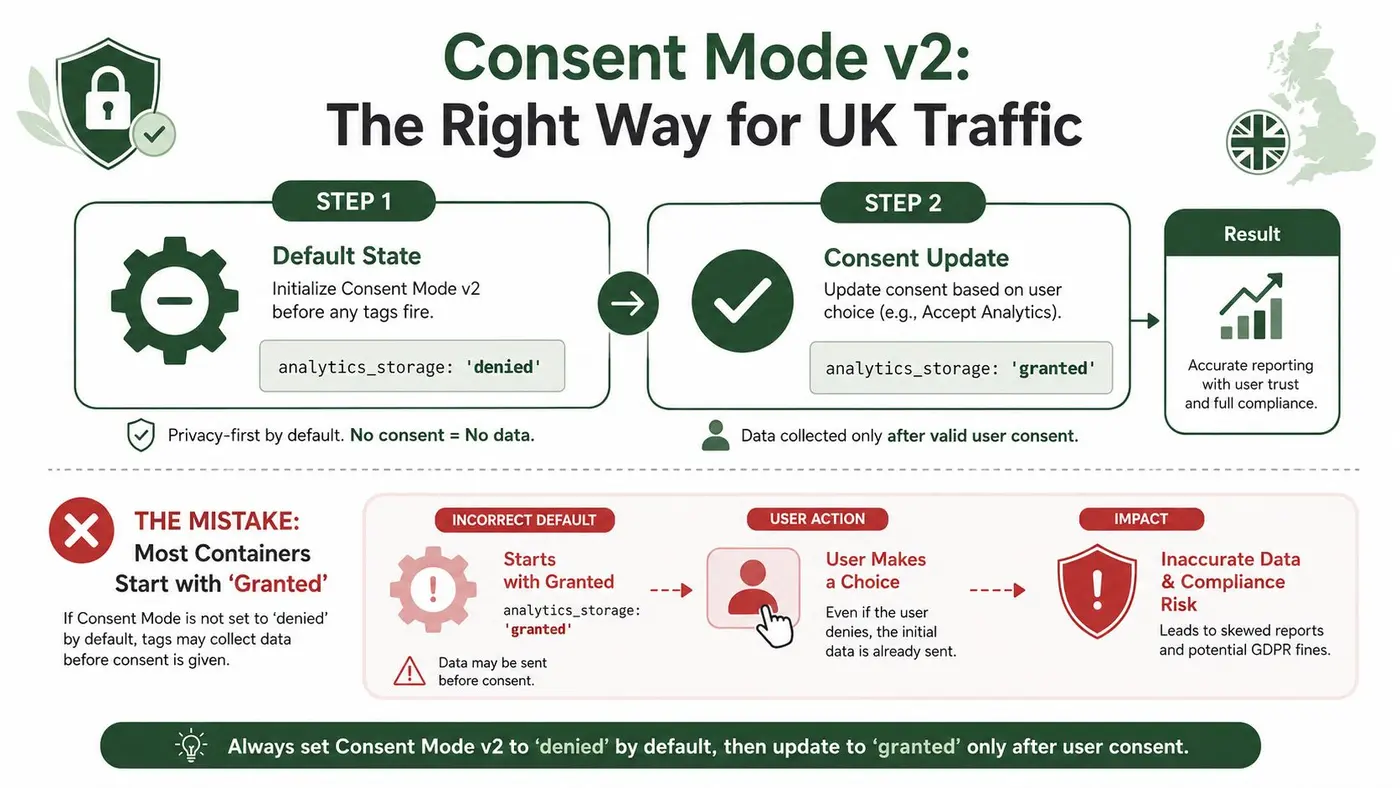
The central mistake in UK consent implementations is sequencing. Teams add a consent banner, connect a CMP event to a GTM trigger and assume that the banner's presence prevents earlier tags from running. It doesn't. The default state must exist before Google tags load, and the later update must reflect the user's actual choice.
Google's consent guidance says default consent settings should be established before any Google tag loads. For UK and EEA traffic, teams should set ad_storage and analytics_storage to denied until the user grants the relevant permission. (Google consent mode guidance)
The two-step pattern
Step one is the default. Use a Consent Initialization tag or a small inline implementation that sets the regional defaults before the Google configuration tag evaluates. Include the relevant consent signals required by the Google setup, and define regional behaviour deliberately rather than assuming one global rule suits every visitor.
Step two is the update. When the CMP returns a real user decision, fire a consent update that changes only the categories the user granted. A dismiss action, banner close or timeout isn't the same as consent. Map the CMP's confirmed event into GTM and test the update in the same browser session.
Google's Tag Manager help documentation includes region-specific configuration and Preview testing for CMP setups, which is important for mixed-region sites. (Google Tag Manager consent configuration help) A global default can be appropriate for some organisations, while others need UK and EEA overrides. The decision should be documented as a policy choice, not hidden inside an unnamed tag.
Test the order, not just the result
In Preview mode, inspect the Consent tab at each event:
- Initial load: Confirm that the denied defaults appear before the GA4 configuration tag.
- User acceptance: Confirm that the CMP event triggers the intended update.
- User refusal: Confirm that no accidental granted state appears later in the journey.
- Subsequent events: Confirm that event tags inherit the state you expect.
Use the browser's network tools to inspect Google collection requests and the consent parameters attached to them. The exact request sequence matters. A tag that eventually shows the right state may still have sent an earlier request under the wrong state.
Consent mode isn't a banner feature. It's an ordering contract between the CMP, GTM and every Google tag.
The UK government's guidance also requires an initial cookie consent banner and a way for users to update their choices when GTM handles analytics and marketing tracking. That update mechanism should be tested as a real user journey, not merely checked in the CMP administration panel.
Preview, Debug, and Publishing Without Breaking Measurement
Preview mode is necessary, but its green tick is easy to overinterpret. It means GTM evaluated and fired the tag. It doesn't prove that the request contained the right event parameters, that consent was correct or that another implementation sent the same event moments earlier.

Test journeys a customer can actually take
Run the container through complete journeys rather than isolated clicks:
- Entry: Land on a category or product page and check the initial page view.
- Consent: Accept analytics, accept advertising separately where applicable, then revisit the choice centre.
- Navigation: Move through SPA routes and confirm that each intended virtual page view appears once.
- Commerce: Add an item, begin checkout and complete a purchase in the test environment.
- Denial: Repeat the journey without consent and confirm that the implementation follows the intended denied behaviour.
Check the Consent tab, the event timeline and the browser network panel together. GA4 DebugView can help confirm that events arrive, but it shouldn't replace request inspection. Look for duplicate configuration tags, repeated page views and event payloads missing transaction or item data.
For a more focused QA process, Google Tag Manager testing is a useful internal reference when teams need to turn Preview mode into a repeatable test routine.
The publishing process deserves the same discipline. Name the version with the change ticket, describe what changed and identify the owner. Never overwrite the live version as though it were a temporary draft. Keep the previous version available so a rollback is a planned operation rather than a frantic reconstruction.
Use Environments to control where a container is tested and published. A separate staging container can provide stronger isolation for larger sites, while smaller teams can still use Preview and controlled test pages. After release, compare the live event stream with the expected journey and watch for duplicate collection immediately, especially after checkout or template changes.
Pre-Launch Checklist and Long-Term Maintenance
A container is ready when another practitioner can understand it, test it and reverse it without asking the original implementer for a guided tour. Before publishing, compare the workspace with production and review every changed asset. Confirm that the release note references the ticket, each tag has an owner and no abandoned workspace contains an unreviewed alternative.
Use a consistent naming pattern such as TAG_Action_Trigger_Variant. For example, GA4_Purchase_CustomEvent_Web tells the next person what the tag does and where it belongs. Apply the same discipline to triggers, variables and folders. Names are part of the control system, not cosmetic decoration.
The release checklist
- Container installation: Confirm the intended container appears once across representative page templates.
- Consent sequence: Repeat the denied journey and verify that defaults precede Google tags.
- Data layer: Check product views, basket actions, checkout steps and transactions against the agreed event contract.
- SPA routing: Test direct loads, internal navigation, browser back actions and refreshes.
- Duplicate detection: Search for legacy Google implementations and compare configuration tags with network requests.
- Version control: Add the ticket, owner, change summary and rollback version before publishing.
- Access and ownership: Remove unnecessary access and assign a responsible owner for every production tag.
Keep the container understandable as it grows. Retire unused assets rather than hiding them in folders, and review whether each tag still serves a reporting, advertising or product decision. A monthly tag audit and a quarterly trigger review create a practical rhythm for catching drift before it damages reporting.
Data governance also includes retention. Document what the site sends, why it sends it and how long the business keeps the resulting data. The operational considerations in data retention policies are relevant when GTM events feed analytics, advertising and experimentation systems.
After publishing, verify that GA4 receives the intended initial page view before checking later events. Record the live container version and keep the rollback path visible to the team. If a release introduces duplicate events or breaks consent sequencing, restoring the last known-good version is safer than editing several live tags under pressure.
Otter A/B helps teams connect website experiments with GTM-based measurement, including goals such as purchases and revenue by variant, so your consent and data-layer work supports decisions beyond basic page views. Visit Otter A/B to see how its integration can fit into a governed experimentation and analytics workflow.
Stop guessing
Ready to start testing?
Set up your first A/B test in under five minutes. No credit card required.
- 14-day free trial
- No credit card required
- Cancel anytime